When creating documents, there are a few steps that can be followed in order to make your content as accessible as possible. For further information on InDesign’s CC accessibility, view this guide from Adobe.
Page Layout
Master pages include common graphics and text for every page of your document
- Use the master options to change master page properties, like master title
- Can have multiple master pages
- Open the Pages panel and double-click on Master page
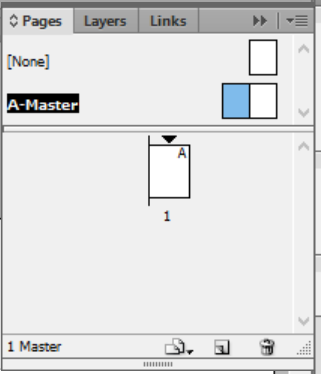
- The page you have selected appears in the bottom left corner of the window
- To create a new master page, open the Pages panel
- Click on Menu > New Master
- At this point, you can choose to make a master page from scratch or to base it on another master page
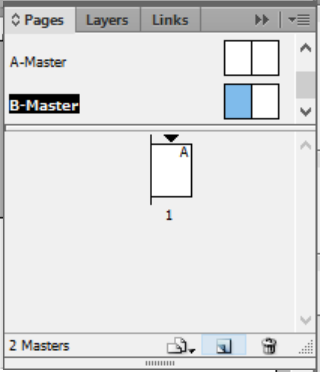
- Click on Menu > New Master
- To apply a Master to a page, click and drag the master onto the page to which it should be applied
- Setting up a Master with a primary text frame is good for long, simply designed documents like books
- When content is added, InDesign will automatically create new pages based off this primary page
All of the settings for your final document should be in place prior to building the document
- The one flexible setting is the number of pages
- Prepare a few styles in advance of importing text
- Adjusting the layout of your document: Objects will not automatically reflow after you change the layout, so it is important to initially set up your document how you’d like the final document to look
- Changing document or page settings will not reflow your document
You can save new document settings as a preset
- There is a save button next to the document preset [custom]
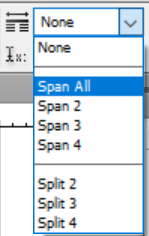
Use Paragraph Layout to set text or objects to span columns
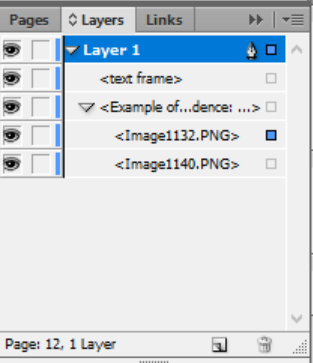
As you create objects, they stack from bottom to top
- This is similar to how objects stack in PowerPoint
- A screen reader will also interpret the reading order from bottom to top
- To change object order, click on Object and select Arrange
- Expanding layers will allow you to see all objects in a page
To wrap text around an object, click Window and select Text Wrap
- Select the object around which the text will wrap and click Wrap Around Bounding Box
- You can also change the offset (space around the object)
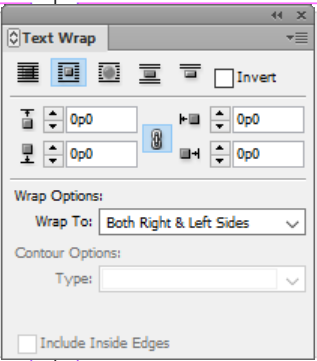
- For irregular shapes: Select object
- In Window, choose Text wrap > Wrap around shape
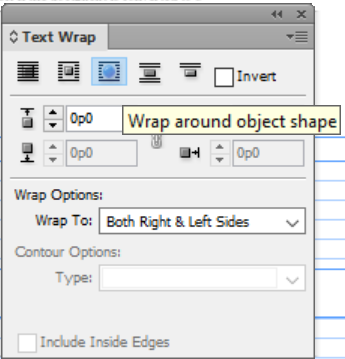
- You can manually change the wrap options
To break the document into different sections:
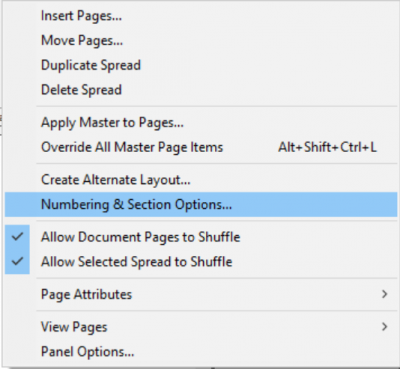
- Open the Pages panel and right click on the page that starts the new section
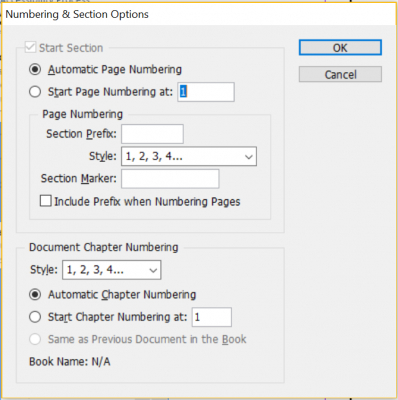
- Click on Numbering and Section Options > Start from page… or Continue from previous…
- To view a page, open the Pages panel and click the down arrow over the page thumbnail
- Example of different sections: numbering an introduction as i-xii
To insert a break character: Select the Type tool > Insert Break Character
- This is similar to a page or column break in Microsoft Word
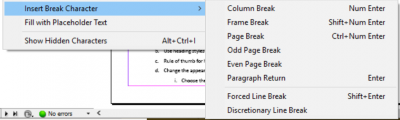
To create a soft return (similar to a line break in Microsoft Word): Use Forced Line Break
Text
Thread text: If text is overflowing a frame, click the red + symbol
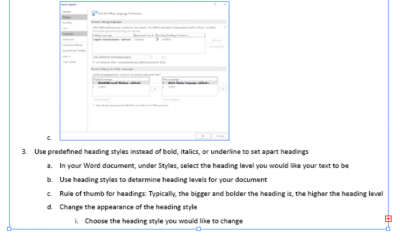
- This loads text into the cursor, so you can put the overflow text into another frame
- Text threads are blue lines that show connected frames
- A small blue arrow in the In Port frame shows the continuation of threaded frames
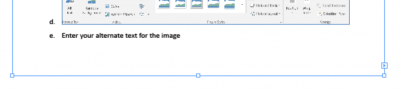
- Empty or hollow In Port boxes show the start of the story
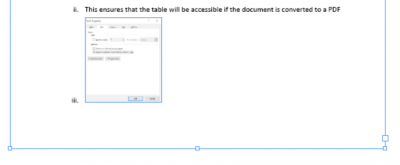
- Select View > Extras > Show/Hide Story Threads
- Threading helps reading order to be correct when exporting to PDF
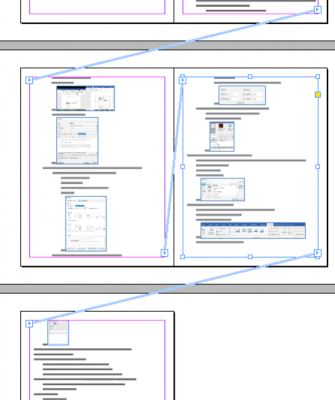
- Click and drag to create a text box for the threaded text
- This is useful for stories, where you may want to continue on a later page
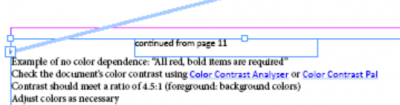
Jump lines like “continued on page…” and “continued from page…”
- To add these lines, create a new text frame and move it completely within the story frame
- Type in the text of choice
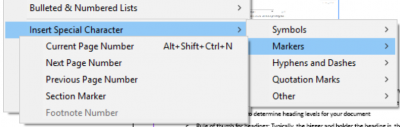
- Select Type > Insert Special Characters > Markers > Next Page Number (or Previous Page Number)
- Then turn on text wrap in the story frame
- To see where to set the “continued from page…” line, follow the text threads
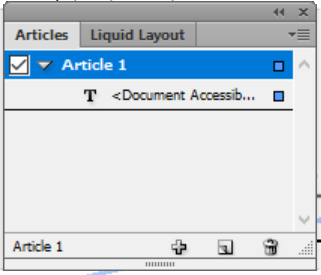
Use the Articles panel: Window > Articles
- This takes all the pieces of a story and puts one section tag (<Sect>) around them
- It also defines the reading order
- Meant for one threaded story or one complex page: Does not work well when rolls over into the second page
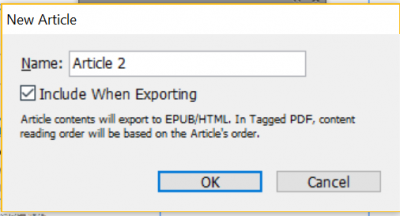
- Click on one piece of the article (Example: the article’s title) and drag into the Articles window
- This will show a dialog box to create new article
- Check off “include when exporting to PDF”
- Drag all pieces of the article into the Article window
To add page numbers: Draw a text box
- Then select Type and click on Insert Special Character
- Select Marker
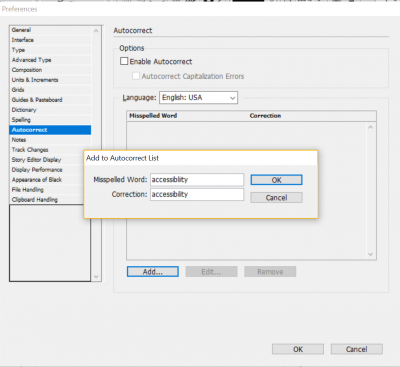
Use autocorrect for misspellings: Select Edit and click on Preferences > General > Autocorrect
- Add in your common misspellings
- Many common errors are preloaded
- Can set it up to replace abbreviations or acronyms with full text
Styles
Use styles to keep formatting consistent
- Click on Window and select Styles > Paragraph Styles (or any other style you would like to set)
- Alt + New Style opens a dialog box for the new paragraph style
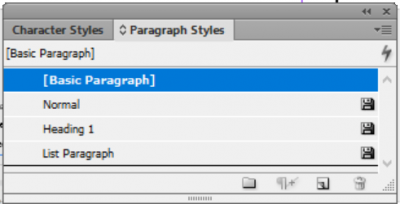
- Changing a style updates any text where the style is used
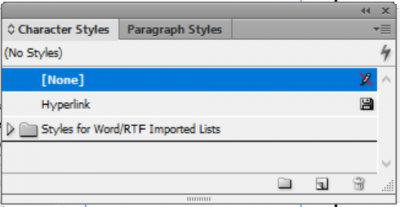
- Use character styles to change the look and feel of a character
- Example: Making text bold or italicized, changing color
- Object styles are very similar to paragraph and character styles
- Select Window > Styles > Object
- Be sure to check off Apply Style to Selection
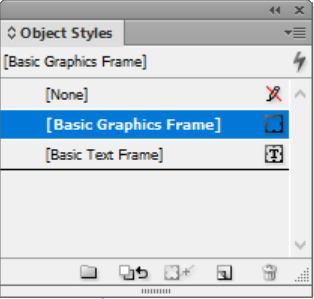
Click on each element to see what style is assigned to the text in Paragraph styles
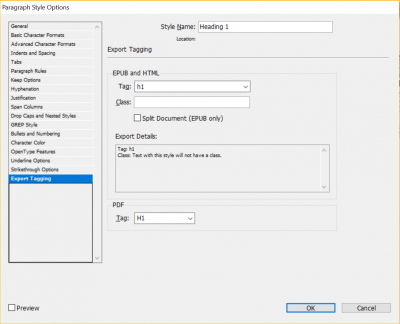
To ensure that a style exports with the correct tag, right click on the style
- Select Edit (style name) > Export tagging
- Set the appropriate tag in the drop down
- The only automatic tagging you should use is for lists
To bring text into the document: Click on File > Place
- Preserve styles and select Show import options
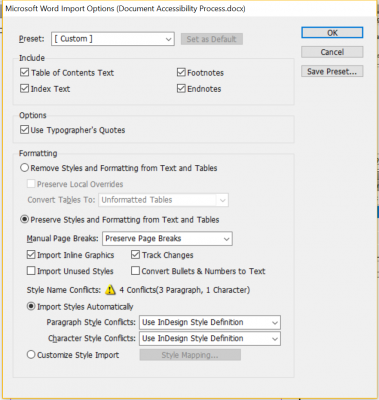
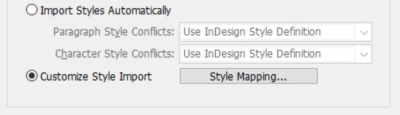
- Select Customize style import > Style mapping: This allows you to assign Microsoft Word styles to specific InDesign styles
- Can also be used with your custom InDesign template
- If choose [new paragraph style], not much of the styling is in your control: InDesign will just import all Word styles as best as it can
- Note: You do not have much control over properties in brackets []
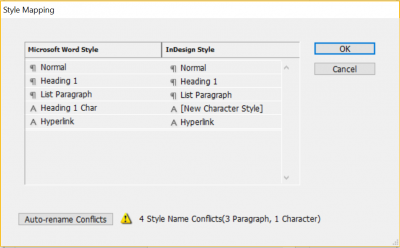
- The bottom options allows you to define your style
- Only need to customize headings and other text formats when you know you’ve used it in the Word document
- All other styles can be mapped to [new paragraph style]
- Must always define list styles (bullets and numbering)
- Otherwise, tags will not be correct when exported to PDF
- The only time you can do style mapping is prior to placing text
- Otherwise, have to start over or manually fix
Right click on a style to change it and select Redefine Style
- This applies to paragraph and character styles
- Apply changes to text and select Redefine style using updated text
- Check Redefine Style when changing all fonts: This will change the style and all text that uses the updated font
- Find all text using a style with the Find and Change dialog box: Select Edit > Find/Change
- Can use this to find and replace formats
- This relies on defining styles ahead of time
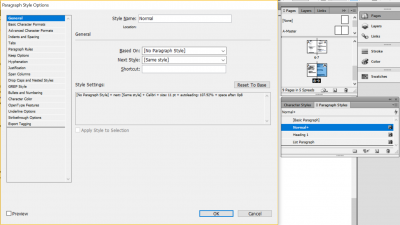
- Find all text using a style with the Find and Change dialog box: Select Edit > Find/Change
Load styles from other documents by opening the Paragraph styles panel
- Click on the hamburger menu and select Load Paragraph Styles
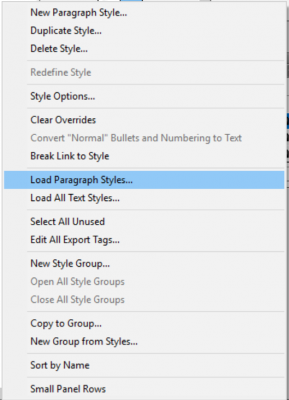
- InDesign will ask where the styles are located: Choose the document from which you want the styles and select the styles you want
Bullets and numbering: Open the paragraph control panel by double clicking on text and switching to the Paragraph panel
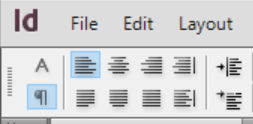
- Click on bullets/numbering
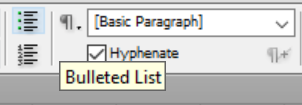
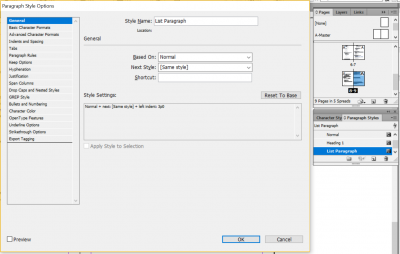
- Change the style using the Paragraph panel menu and selecting bullets and numbering
- Allows you to change the numbering style, how much space is between the bullet or number and the text, the bullet or number’s color, etc.
- Only use Unicode characters for bullets, not WingDings or similar characters
Nested Styles: Double click on a Paragraph style and select Drop caps and nested styles in the dialog box
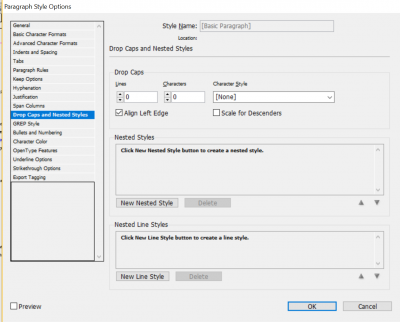
- Nested Styles are similar to CSS in that there are parent and child styles
Do not use skew to create false italics: This does not change the code to show emphasis
Tables
To draw tables, use the Type tool to draw a box
- Table tool can be used after drawing the frame
- Click Table > Insert Table to set up your table
- Use Table > Table Options > Table Setup to set header and footer rows
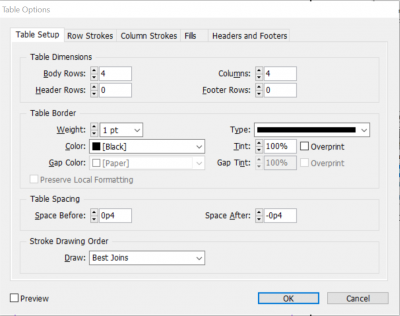
- Use tab to add rows
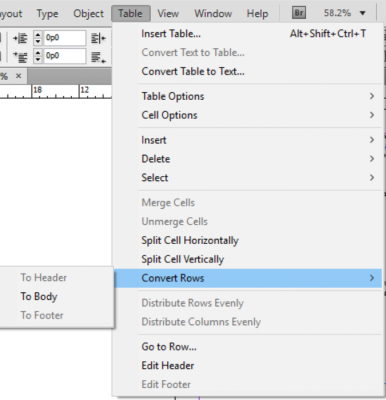
To set table headers and footers from existing rows:
- Select a row
- Click Table and choose Convert Rows
You can embed styles into table styles
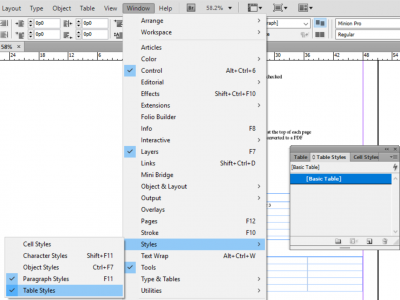
- Select Window > Styles > Table styles to edit table style
Convert table to text: Select Table > Convert table to text
- Set options like column and row separators
- Text is separated by tabs, which shows InDesign how to create columns
- New paragraphs show where rows should be
Interactive
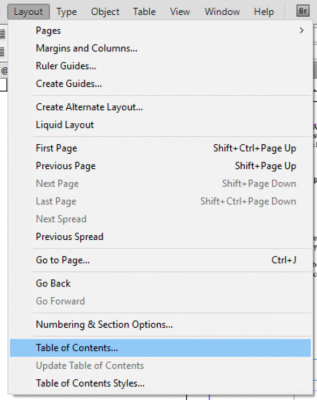
Table of Contents: InDesign knows the Table of Contents based on headings defined in Paragraph styles
- Select Layout and click Table of Contents
- Include paragraph styles
- Example: Heading 1
- Table of Contents styles are automatically created when you generate your Table of Contents
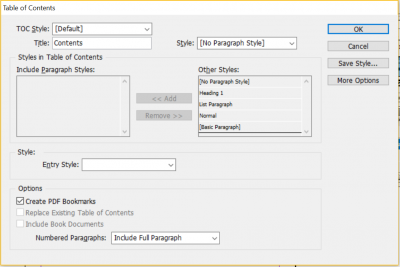
- You can automatically create bookmarks in your PDF from the Table of Contents
- You can also automatically create text anchors in the source paragraph, which allows you to click and jump directly to that point
- Include all book documents in your Table of Contents
- Manually set page number styles for any paragraph styles included in the Table of Contents
To create bookmarks: Select Window > Interactive > Bookmarks
- Select the text you would like to be your bookmark and click Create new bookmark
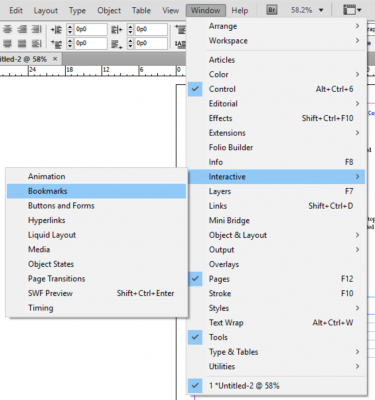
- When exporting to PDF, click Include bookmarks
- Add bookmarks to any document where you want users to know information, especially if that information is not on the first page
To add hyperlinks, select Window > Interactive > Hyperlinks
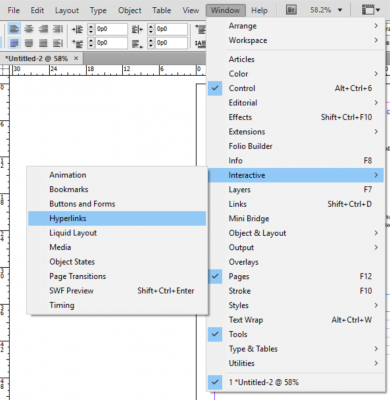
- Select the text you would like to be your hyperlink and type in the URL
- Can also set links to send to file, email, etc.: Create a new hyperlink from the hamburger menu
- InDesign automatically creates a character style called Hyperlink, which you can edit
Miscellaneous
To create an accessible PDF: Select Paragraph styles and select Style options
- Select Export Tagging
- Select the appropriate PDF tag
- Do a 1:1 match: Leave lists, footnotes, and endnotes as is, but check the mapping of other styles
- Always save before sending to PDF
- Choose File > Export >Save as type > PDF Interactive
- In the export dialog box, export as pages (not spreads)
- Check the boxes for Create tagged PDF and Use structure for tab order
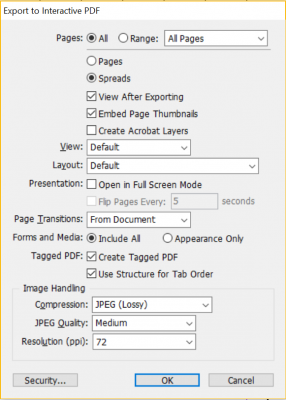
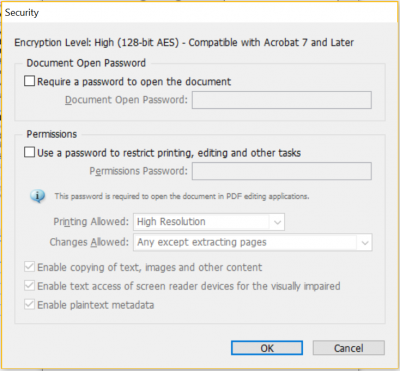
Under Security, enable text access of screen reader by checking the box
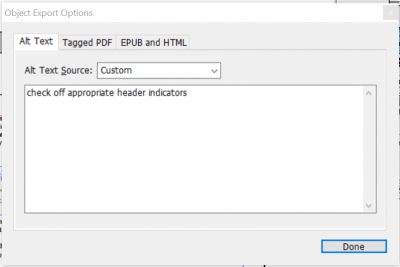
To add alternate text to images:
- Select Graphic and then click Object
- Under Object, select Object export options
- In Object export options, select Alternate text source > Custom
- Input your text
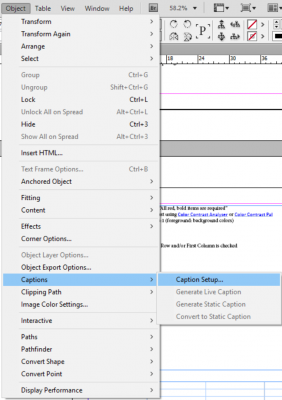
Add metadata captions:
- Select Object > Captions > Caption setup
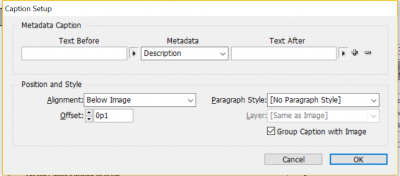
- Change metadata type to Description
- Group captions with image
- Fill out the description field for each image and enter descriptive text
- This will be used as captions
Add swatches and styles to your Creative Cloud library: Window > CC Library
- Click on the swatch or characters with styles and add to library
- Can add graphics to library as well
- Easy to use between documents
- Can share the library with other documents and users
To save InDesign templates, click File
- Select Save As and save the file as a .indt file

- When opening the template, can open as a new blank document (normal), the original template, or a copy of the template
- The default open is as a new blank document
Stick to a single layer using the Layers panel: Window > Layers
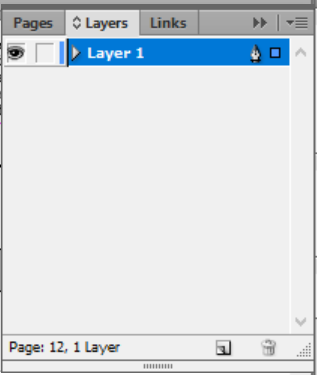
- Adding additional layers changes the reading order dramatically
- Click and drag objects in the Layers window to reorder: This affects the PDF’s reading order
- Check off Use for reading order in tagged PDF
- If you must use multiple layers, flatten before exporting to PDF
- You will have to manually check the reading order, because it will be changed in the PDF